The Ultimate Guide to Using Printed Textile Inks for Unique Crafts
In this guide, we will explore the use of printed textiles for creative endeavors. Printed textiles have become an essential part of modern art and design, offering a unique and versatile medium for creating intricate designs. From wall art to fashion accessories, these printed textiles can be used to create a variety of beautiful and eye-catching pieces.,To start with, you'll need to choose the right print style for your project. There are many different types of printed textiles available, including monochromatic, gradient, and patterned prints. Each type has its own unique look and feel, so it's important to choose something that speaks to your personal taste.,Once you have chosen your print, you'll need to decide on the finishing techniques you want to use to enhance the look of your piece. Some common finishing techniques include embroidery, applique, and stencilling. These techniques can add texture, interest, and dimension to your design.,Finally, don't forget the details! The finishing touches can make all the difference in transforming your printed textile into a stunning work of art. Whether it's adding a ribbon tie to hang your piece or adding a few decorative beads, there are endless ways to customize your finished product.,So why not try your hand at some printed textile crafts? With a little creativity and attention to detail, you can turn any ordinary item into something truly special and unique.
Introduction: If you're a craft enthusiast looking to add a unique touch to your home decor, consider incorporating printed textiles into your projects. Printed textile inks are not only functional but also incredibly versatile, allowing you to create beautiful and personalized decorations that can be used in a variety of ways. In this guide, we'll walk you through the steps on how to use these inkjet prints to create stunning crafts. Let's get started!
Materials: Before we begin, it's important to gather all the necessary materials. Here's a list of what you'll need:
- Printed textile ink pads or reusable bottles (e.g., fabric pens)
- Inkjet printer
- Stamping plate with adhesive (optional, depending on the design)
- Scissors
- Ruler
- Pins or tweezers for precision cutting
- Transfer paper or cardstock (for transferring designs onto other surfaces)
- Heat gun or hair dryer
- Rubber band
- Adhesive (optional)
- Scissor blades or scissors (for precise cuts)
Step 1: Preparation

- Choose the design: Depending on the type of textile ink you have, select a printable pattern that matches your project. Some inks come pre-cut, while others require you to cut the design out yourself. If you're using a pre-cut piece, make sure it's large enough to cover the entire area you want to print on.
- Prepare the surface: Clean the area where you want your printed textile to be placed. This will ensure a smooth surface for printing. You can use an iron if necessary to smooth out any wrinkles or creases in the material.
Step 2: Printing Your Pattern
- Place the pattern on the desired surface and align it precisely according to the instructions on the packaging.
- Load the inkjet printer and select the appropriate settings based on the ink type you're using. For most inks, you can set the print speed to slow for best results.
- Print the pattern onto the fabric. If you're using pre-cut pieces, carefully cut around the edges to avoid damaging the design.
Step 3: Transferring Designs to Other Surfaces
- Once you've printed the design, remove it from its original backing and transfer it onto a new surface like cardstock or transfer paper.
- Use a ruler to measure and cut out the exact shape or size of the design, ensuring that you leave enough room for any additional trimming.
- Apply a layer of adhesive or double-sided tape to the back of the transfer paper, making sure to cover the entire area where the design is going to be applied.
- Press the transferred design onto the desired surface. Gently press and hold for a few seconds until the ink has adhered. Remove the paper backing and admire your work!
Case Study: Personalized Wall Art Let’s take a closer look at a real example of how printed textile ink was used to create a unique wall art piece.
Client: Jane had been wanting a personalised wall art piece for her living room for years, but she didn’t know how to go about it. She decided to try using printed textile ink herself, and boy was she impressed!
Materials: Jane purchased some pre-cut printed textile ink pads and a small frame for hanging the artwork. She also gathered some scraps of fabric for her design.
Steps:
- Decided on her design: Jane drew inspiration from her favorite quotes and incorporated them into a simple geometric pattern on one side of her design. She made sure to include some text as well, adding a personal touch to her artwork.
- Prepared the surface: Jane cleaned her wall and hung the frame up. She then prepared the fabric by folding it in half lengthwise and cutting along the fold lines to create a smaller version of the design.
- Printed her pattern: Jane loaded her printer and carefully printed her design onto the folded fabric. She followed the instructions on the package for best results.
- Transferred her design: Once the design was printed, Jane removed it and placed it onto the backing of a new piece of transfer paper. She measured and cut around the edges carefully to ensure the design would fit perfectly on the wall.
- Installed her artwork: With the design securely attached to the backing, Jane carefully hung the artwork on her wall. It looked great, and Jane was thrilled with her finished product!
Conclusion: Printed textile ink is a versatile medium that can transform any room into something truly special. From wall art to home decor, there are countless possibilities when it comes to creating personalized items using this technique. Whether you're a beginner just getting started or a seasoned crafter looking for something new to try, the possibilities are endless. So why not give it a try today and see what amazing creations you can create? Happy crafting!
【英文口语化内容】
大家好,今天我们将通过一段视频来详细介绍纺织品印油的使用方法,在纺织品印制过程中,印油的使用是至关重要的,它能够为作品增添独特的纹理和色彩,下面我们将通过图文结合的方式,为大家详细介绍纺织品印油的使用步骤。

纺织品印油使用步骤
选择合适的印油类型
在开始使用纺织品印油之前,我们需要先选择合适的印油类型,根据不同的纺织品材质和设计需求,可以选择不同的印油类型,如水性印油、油性印油等,在选择时,我们需要考虑印油的干燥速度、附着力、色彩鲜艳度等因素。
准备工作
在使用纺织品印油之前,我们需要对纺织品进行适当的处理,这包括清洁表面、去除杂质、修补瑕疵等,我们还需要准备好所需的工具和材料,如印油枪、印台、棉签等。
涂抹印油
我们就可以开始涂抹印油了,将适量的印油涂抹在需要印刷的纺织品表面,涂抹时需要注意均匀涂抹,避免出现漏涂或过多的情况,涂抹完成后,等待印油干燥。
检查和处理瑕疵
在印刷过程中,我们还需要注意检查和处理纺织品上的瑕疵,如果发现印刷后的纺织品上有瑕疵或污渍,需要及时进行处理,可以使用棉签或清洁剂进行清洁,然后再进行下一步的印刷操作。
注意事项

在使用纺织品印油时,我们还需要注意一些事项,要选择合适的印油类型和品牌,以确保印出的效果符合预期,要注意涂抹的均匀性和干燥时间,避免出现印刷效果不理想的情况,要注意保护环境,避免使用后的印油残留在纺织品上造成污染。
案例说明
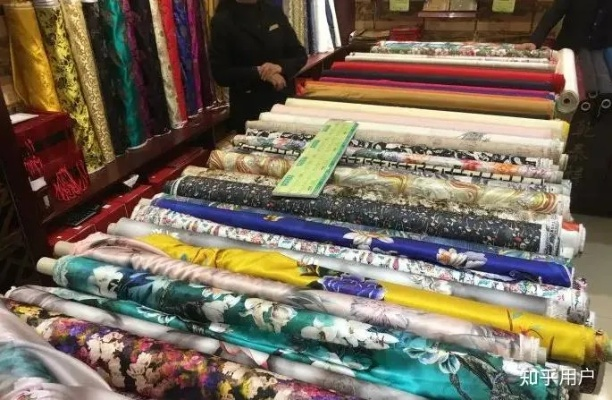
下面我们通过一个具体的案例来说明纺织品印油的使用方法,假设我们有一件丝绸制品需要进行印花,我们需要使用水性印油来增加丝绸制品的纹理和色彩,在涂抹印油时,我们需要先将丝绸制品表面清洁干净,然后选择合适的印油类型和品牌进行涂抹,在涂抹完成后,我们需要等待一段时间让印油干燥,然后再进行后续的印花操作,通过这个案例,我们可以更好地理解纺织品印油的使用方法和注意事项。
图文说明
以下是关于纺织品印油使用的图文说明:
【图文说明】
- 选择印油类型:根据丝绸制品的材质和设计需求,可以选择水性印油或油性印油。
- 准备工作:清洁丝绸制品表面、去除杂质、修补瑕疵等,准备好所需的工具和材料:如印油枪、棉签等。
- 涂抹印油:将适量的印油涂抹在丝绸制品表面,注意均匀涂抹,避免漏涂或过多,等待一段时间让印油干燥。
- 检查和处理瑕疵:如果发现印刷后的纺织品上有瑕疵或污渍,需要及时进行处理,可以使用棉签或清洁剂进行清洁。
- 注意事项:选择合适的印油类型和品牌、注意涂抹均匀性和干燥时间、保护环境等。
通过以上介绍,我们可以了解到纺织品印油的使用方法和注意事项,在使用纺织品印油时,我们需要选择合适的印油类型和品牌,注意涂抹均匀性和干燥时间,保护环境等,我们还可以通过具体的案例来说明纺织品印油的使用方法和注意事项,希望这篇英文口语化内容能够帮助大家更好地了解纺织品印油的使用方法。
Articles related to the knowledge points of this article:
The Art of Turning Oil into Fashionable Textiles
Exploring the Evolution of Nanjings Textiles in Railway Freight
Textiles Needed for GRS Focus:A Comprehensive Guide to Sustainable Textiles